-Setup for machine that will be connected into-
Go to https://www.teamviewer.com/en-us/download/windows/
Click on “Download Team Viewer”

Run the file the installer that downloaded
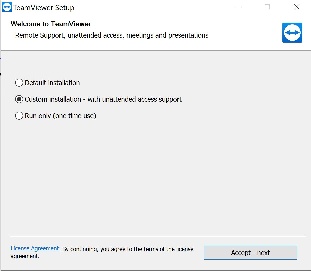
When it launches choose “custom installation – with unattended access support”
Once the completes click “Finish”
Team Viewer will automatically launch to complete the rest of the configuration
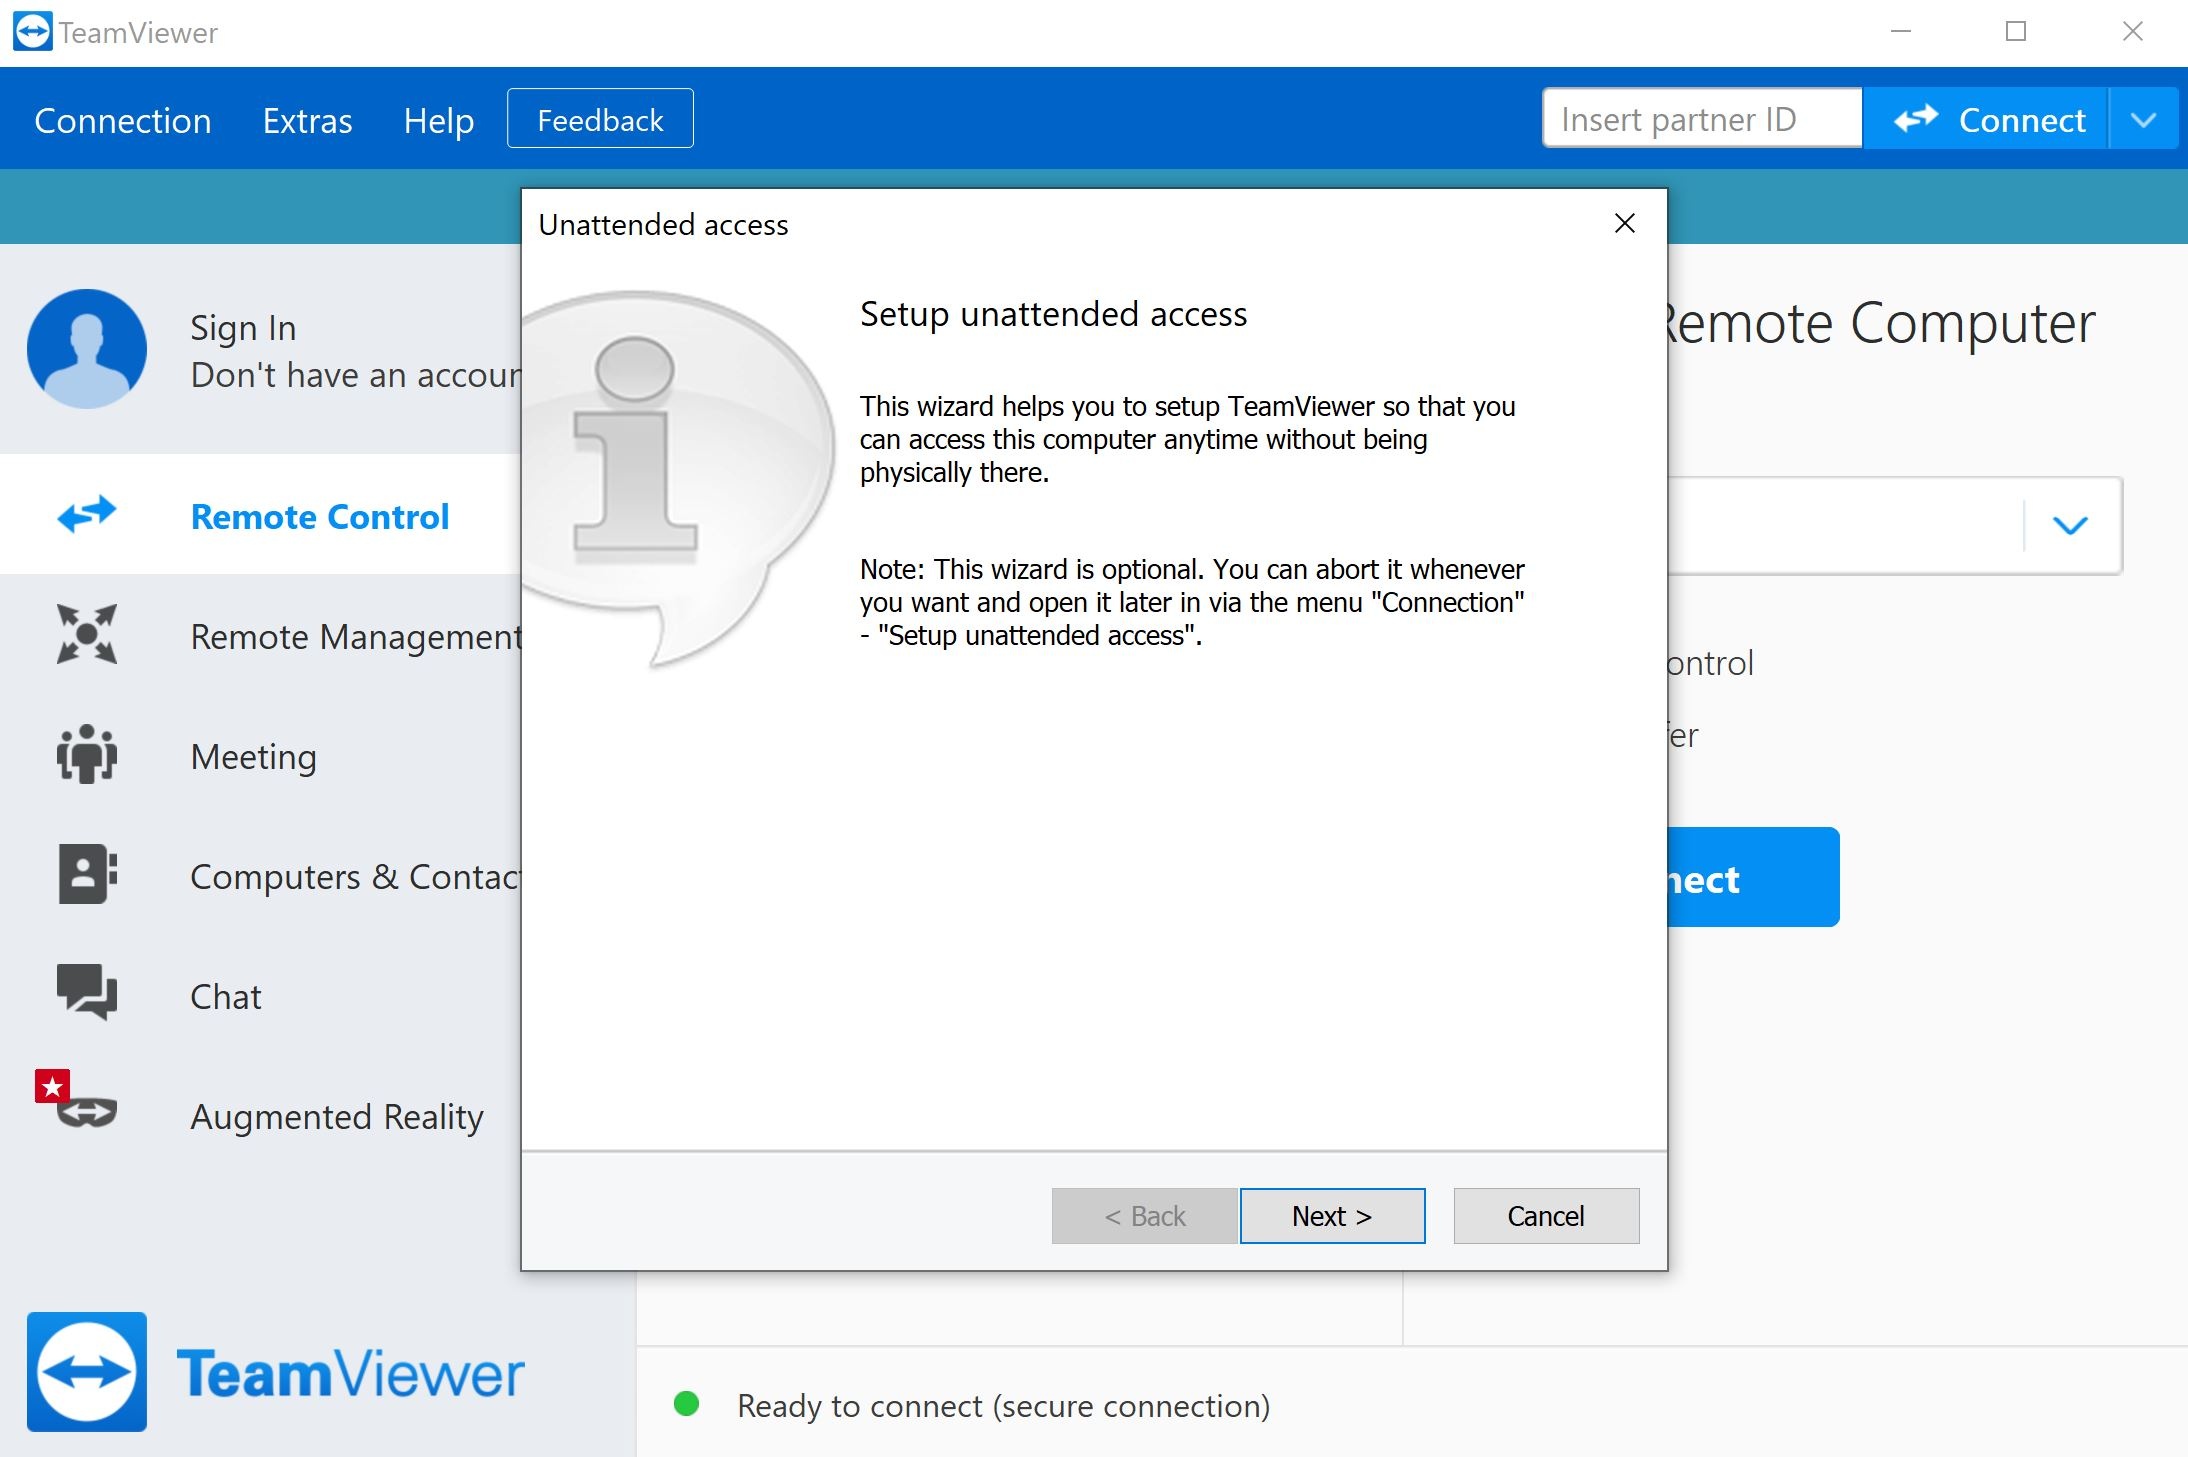
On this screen click “Next” to setup unattended access

On the following page put in the machine name, and have the faculty enter a password they’d like to use for connecting into the machine (needs to be at least 6 characters, also this will never change)
Once done, click “Next”
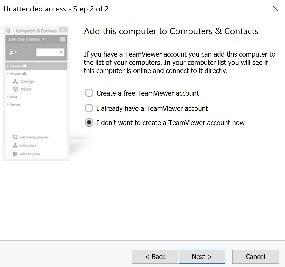
On the next page choose “I don’t want to make a Team Viewer account now”
Click “Next”
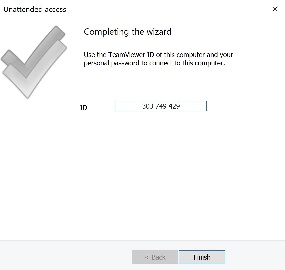
This page shows what your ID will be to connect to your machine
Setup is completed
-Setup the machine that you’ll use to access your other machine-
Go to https://www.teamviewer.com/en-us/download/windows/
Click on “Download Team Viewer”
Run the file the installer that downloaded
Choose “Default Installation”
Click Next
Click Finish once completed
Team Viewer will launch automatically
-To access your machine remotely-
Open Team Viewer on your machine
Enter in the code Team Viewer had assigned
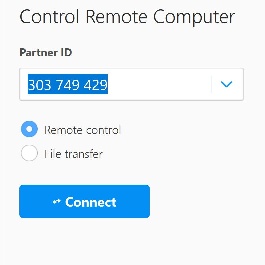
Click Connect
Enter in the password you created on the next prompt
You should be connected into your machine
Overview
Content Tools